If you grew up in a home where nothing went to waste, you’ve probably heard about lard.
Your grandmother might have had a jar of it sitting on the kitchen counter, ready to fry up anything.
These days, lard has a bit of a “forgotten treasure” status….. replaced by vegetable oils and margarines.
However, lard is flavorful; all these other oils just can’t compare.
Lard is almost as good as bacon grease; it just comes close
Rendering pork fat into lard is an old-fashioned art, and the good news is that it’s making a comeback lately.
Prices in grocery stores keep climbing, so getting the most out of every ingredient makes sense.
Turning pork fat (which you might otherwise throw away) into a useful, shelf-stable cooking fat is a small but satisfying way to save money while adding something truly delicious to your kitchen arsenal.
But to be honest, anyone who has lard isn’t just about saving money but knows its flavors.
Why Rendering Pork Fat is Worth It
If you’ve ever fried food in lard, you already know: the flavor is out of this world. As said before, this is the closest you can get to bacon grease. It adds mouthful richness that neutral oils can’t match.
While you can buy lard from the store, the recent popularity spike means prices are so high it’s not worth it….So making it at home just makes sense.
Homemade lard is also:
- Simple – You only need pork fat and basic kitchen equipment.
- Economical – It’s essentially free if you save trimmings from a roast or ask your butcher for scraps. Or if buying, they are dirt cheap, almost free. You can get 1lb for just a dollar, depending on where you live.
- Versatile – Great for frying, sautéing, baking, and even making non-food items like candles or soap. But the true shine is in baking and frying!
- Practical – Long shelf life when stored properly. Doesnt need refrigeration, can stay on the counter…I’m talking about a North of 3 months if stored in an airtight container.
And let’s not forget one of lard’s best properties: it has a high smoke point.
That means you can fry at higher temperatures without your kitchen smelling like burnt oil from the smoking oil.
What You’ll Need
Ingredients:
- 2 pounds pork fat – Fresh or frozen….Ask your butcher; they might give you some for free or sell it at a minimal cost.
Equipment:
- Sharp knife
- Cutting board
- Medium or large pot (Dutch oven works best)
- Slotted spoon
- Fine mesh strainer (or cheesecloth, paper towel, or coffee filter)
- Measuring cup or pint-sized mason jar
Step-by-Step: How to Render Pork Fat
Step 1: Prepare the Fat
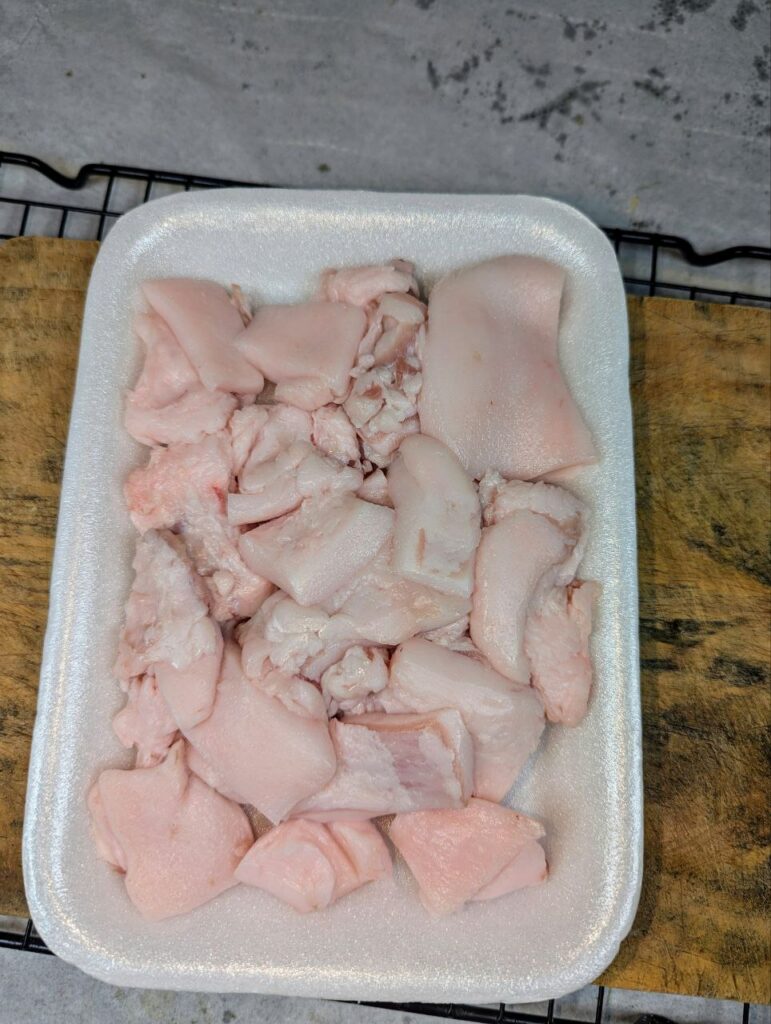
If the fat is frozen, let it partially thaw. You don’t want it rock-solid, but keeping it a bit firm makes it much easier to cut.
Trim off any meat or connective tissue — you want pure fat for clean-tasting lard. Slice into roughly 1-inch cubes.
As from above, I got my pork pieces pre-sliced from the butcher, but trust me you want them tinier than that.
The smaller the cubes, the better they will render to completion…..larger surface area to render out.
So I cut them further before proceeding, and so should you
Pro Tip: A semi-frozen block of fat slices like a dream compared to fully thawed fat, which can be slippery and harder to work with.
Step 2: Slow Cooking
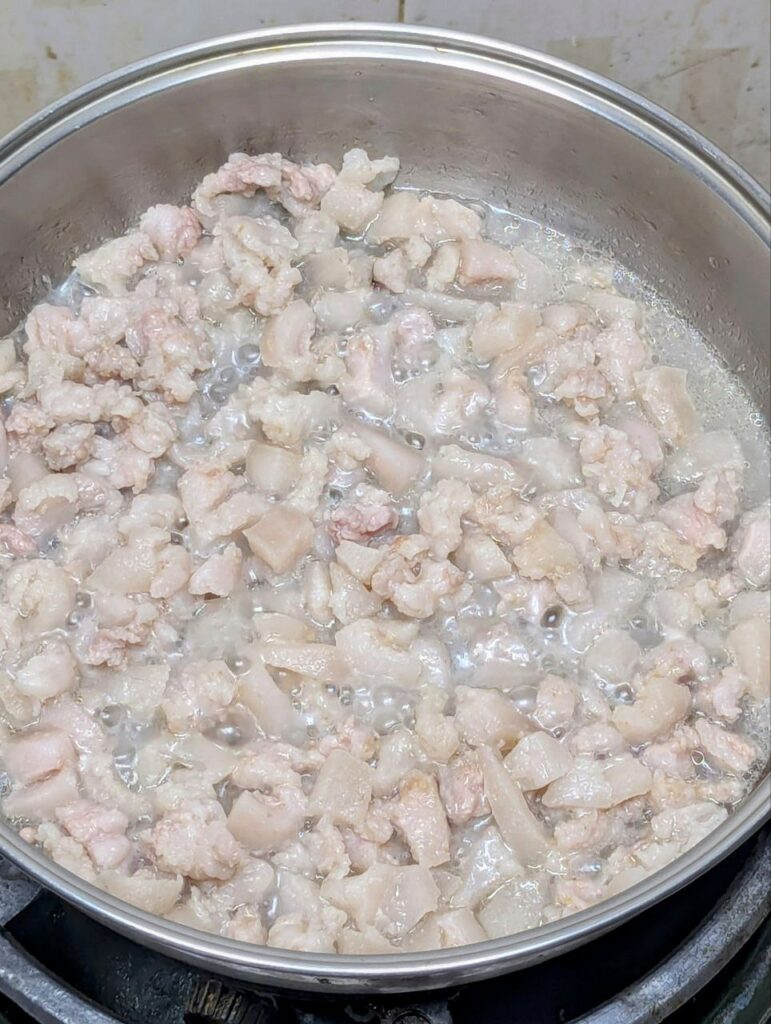
Place the chopped fat into your pot. A wide pot or pan is ideal for reducing the time needed for this.
This is an optional step, but add just enough water to cover the surface; this will help to prevent the cubes from burning out before rendering out.
Also, set your burner to the lowest possible heat. This is probably the most important instruction here
This is not a quick recipe. Depending on how much fat you’re rendering, the process can take anywhere from 40 minutes.
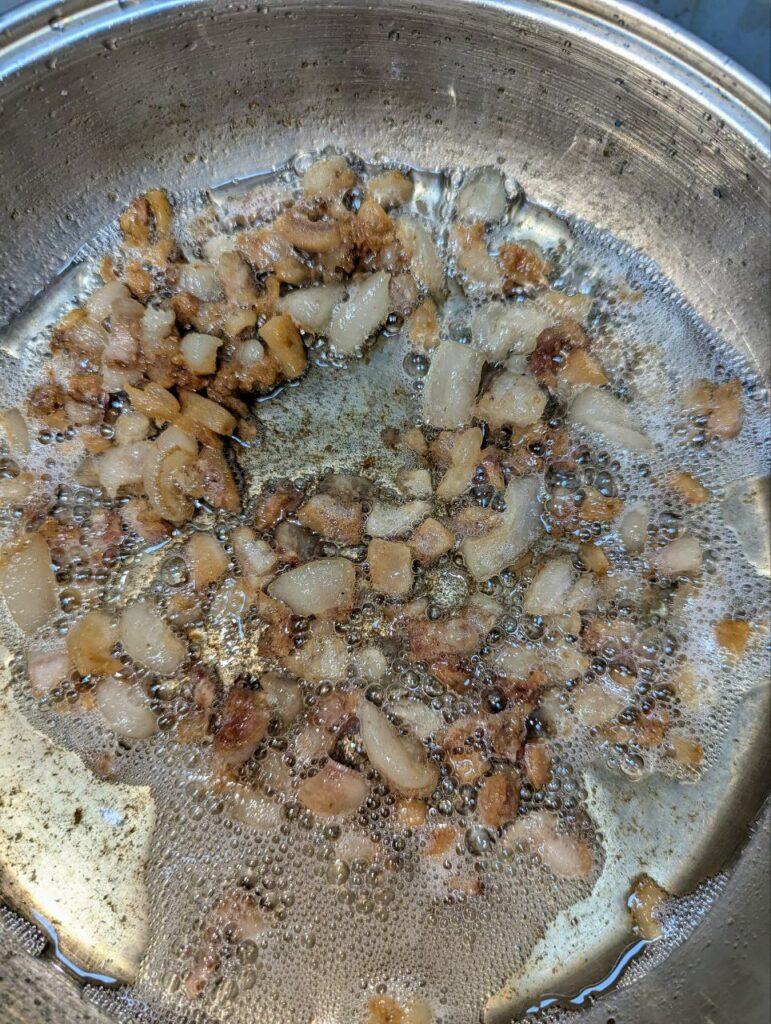
But over the 40 minutes, you will need to occasionally stir off sticky bits that will start cementing at the bottom of your pan
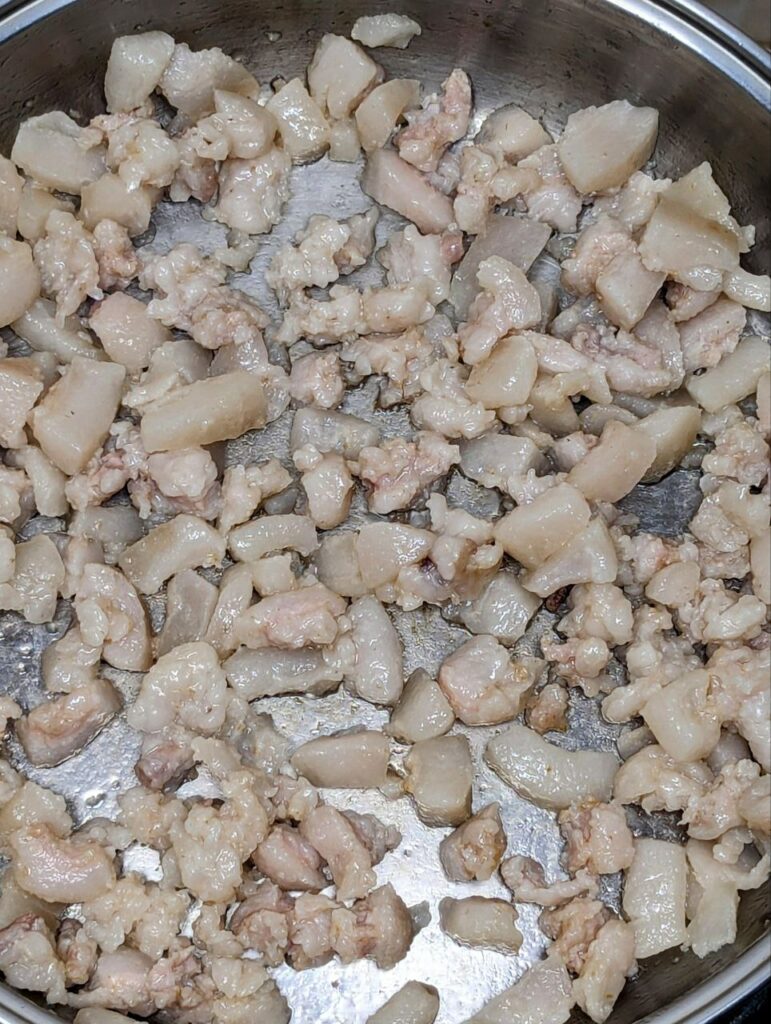
Over time, the fat will slowly melt down into liquid, and the solid bits (called cracklings) will shrink and turn golden brown.
Once all the water is evaporated, then rendering will soon start, turn things around from time to time, say every 10 minutes.
Important: Resist the urge to turn up the heat to “speed things along.” Low heat gives you a whiter, cleaner-tasting lard.
High heat can cause burnt, bitter flavors and a darker color, and won’t render out as enough lard for the same quantity of scraps
Step 3: Strain and Store
Once the fat has fully rendered and your cracklings are crispy, use a slotted spoon to remove them from the pot.
Don’t toss them out; cracklings make an amazing snack or salad topping.
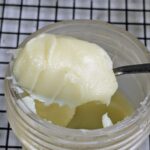
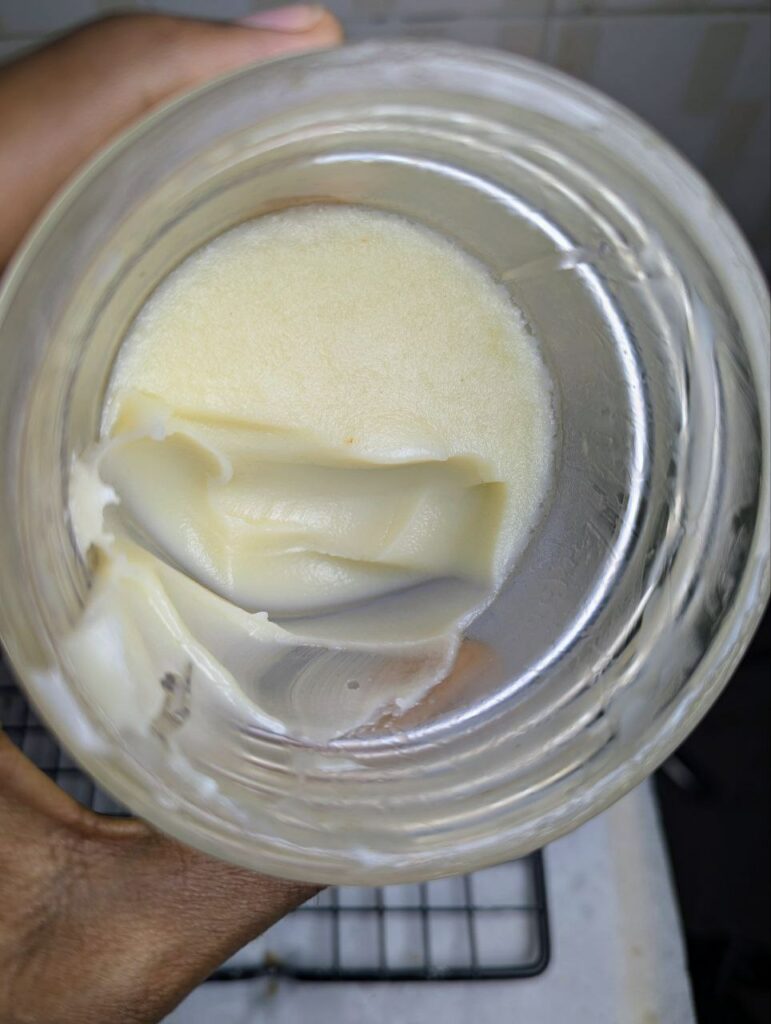
Now, strain the liquid fat through a fine mesh strainer into a measuring cup or jar.
For a crystal-clear result, strain it again through a soup bag, cheesecloth, or even a coffee filter.
But never mind, since the tiny crystals will settle to the bottom and sediment there, so filtering is an optional step.
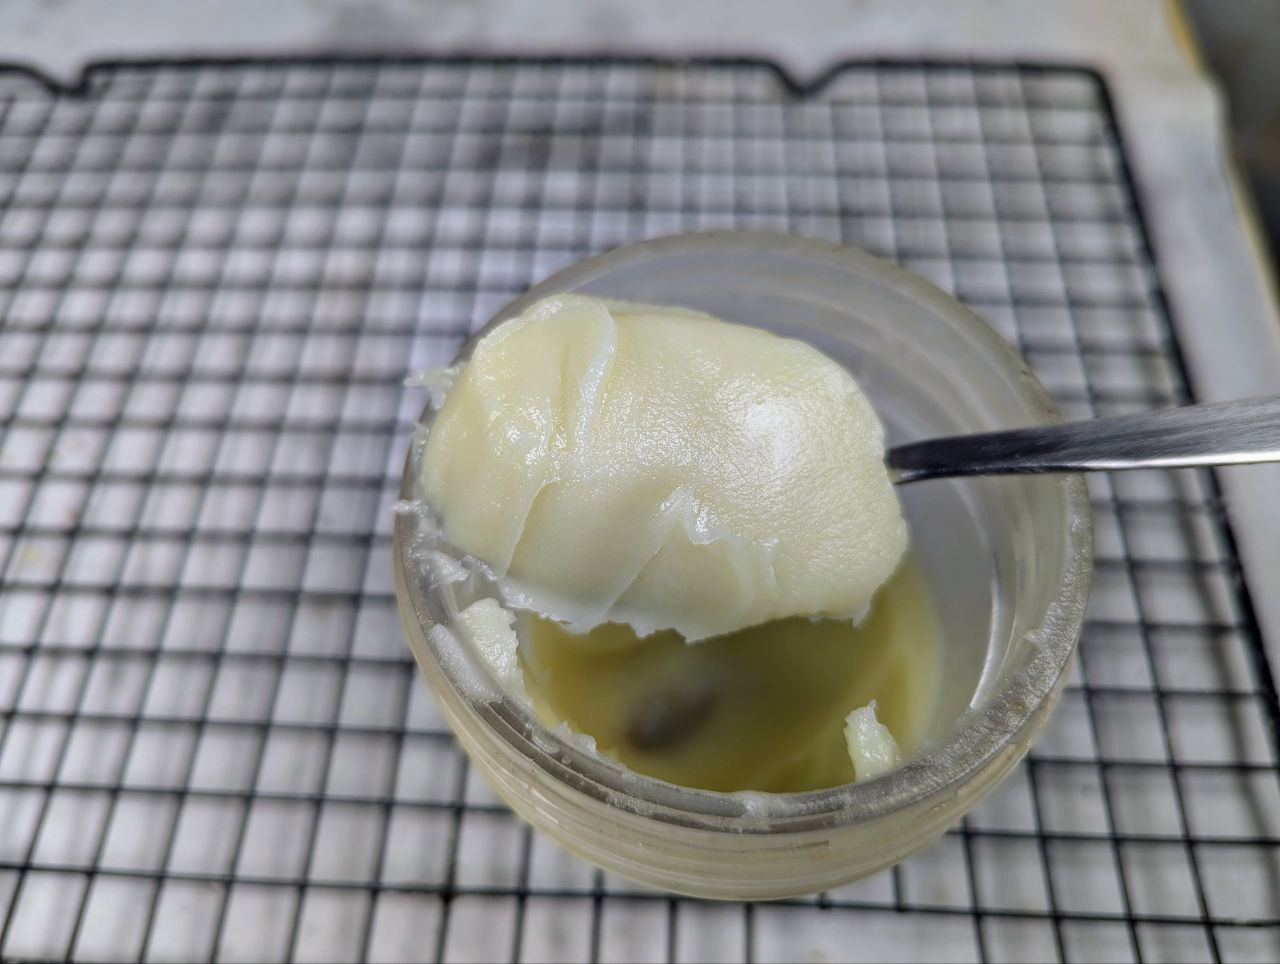
Let the lard cool to room temperature before putting a lid on it. For short-term use, store in a cool, dark pantry.
For longer storage, keep it in the fridge or freezer.
Home Made Pork Lard
Equipment
- Sharp Knife
- Cutting Board
- Large Wide Pot/Pan
- Measuring cup or mason jar
Materials
- 2 lbs pork fat fresh or frozen, trimmed of meat/tissue
- Optional: Splash of water to prevent burning
Instructions
- Partially thaw pork fat, trim meat, and cut into small cubes.
- Place cubes in pot, add splash of water if desired, and heat on lowest flame.
- Stir occasionally to prevent sticking while fat slowly melts.
- Continue cooking until water evaporates and cracklings turn golden brown.
- Remove cracklings with slotted spoon and save for snacks.
- Strain liquid fat into a jar through fine mesh or cheesecloth.
- Cool to room temp before sealing; store in pantry, fridge, or freezer.
Video
How to Use Your Homemade Lard
Once you’ve got your jar of fresh lard, the possibilities are endless:
- Frying: Perfect for potatoes, chicken, tortillas…… basically anything you want crispy.
- Baking: Use it in pie crusts for that tender, flaky texture.
- Seasoning cast iron: Keeps skillets non-stick and rust-free.
- DIY projects: Lard is an old-fashioned base for candles, soaps, lotions, and healing salves.
And yes, you can also use it to make traditional recipes like tamales, biscuits, or empanadas that truly shine when made with real lard.
Storage Tips
- Pantry: Up to a month in a cool, dark place.
- Fridge: Several months.
- Freezer: A year or more…..Always use a clean spoon when scooping to avoid contamination.
Extra Tips
- If you don’t own a fine mesh strainer, improvise with cheesecloth, a paper towel, or a coffee filter.
- Keep the heat low at all times. This is the single most important factor in getting perfect lard.
- Don’t have pork fat at home? Your local butcher is your best friend. Many will happily give away scraps.
Nutritional Info (Per Tablespoon)
- Calories: ~115
- Fat: 12.8g (6.4g saturated)
- Protein: 0g
- Carbs: 0g
- Cholesterol: 14mg
- Sodium: 0mg
Final Thoughts
Rendering pork fat might seem like something only homesteaders or old-fashioned cooks would bother with, but it’s one of those back-to-basics skills that’s both practical and rewarding.
With just a little patience, you can turn kitchen scraps into a flavorful fat that’s been used for centuries.
So the next time you buy a pork roast or belly, remember the trimmings are gold. Just collect them and make lard whenever,
All they need is a little time, a bit of heat, and you’ll have a jar of homemade lard that could easily rival anything on store shelves.
Also Read
Aloo Keema- Pakistani Potato Minced Lamb Curry Recipe
Leave a Reply