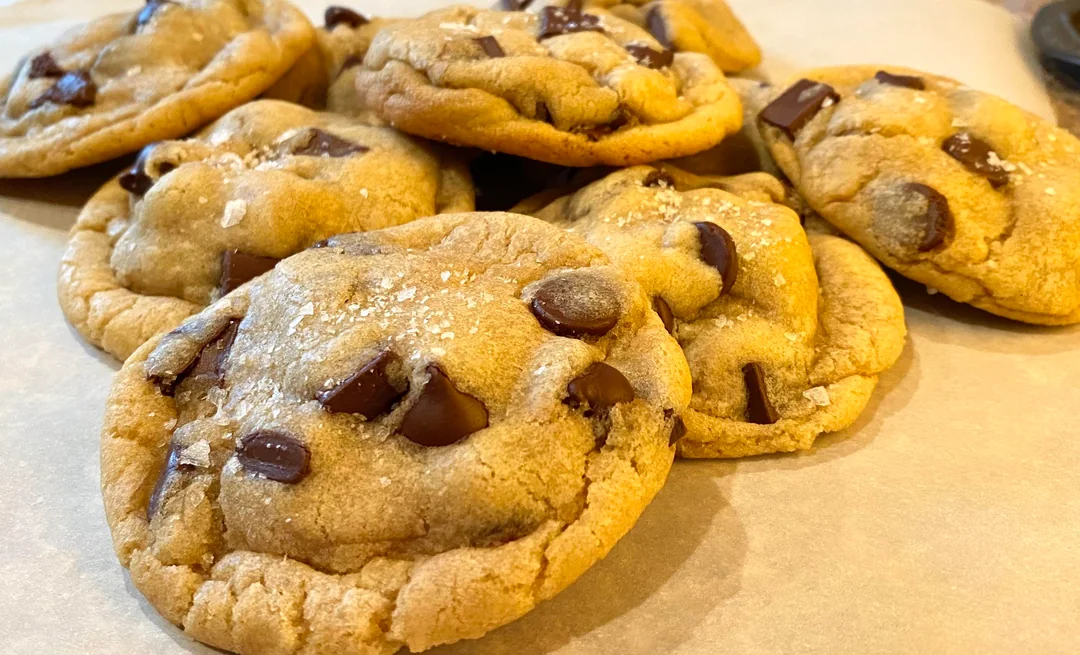
Chocolate chip cookies are the classic default cookies, still good but maybe a little… flat? There is a reason why almost all the popular cookie recipes use brown butter.
This recipe takes that baseline and lifts it with browned butter, a pinch of cinnamon, and a sprinkle of sea salt.
There are no downsides to this style, unless you count the longer chilling time as a downside; then there are none.
So, if you have butter, some sugar, and the patience to chill the dough for a couple of hours (I know, a big ask)…..
You’re on track for cookies that taste like they came out of a nice bakery.
Why These Cookies Hit Different
Most chocolate chip cookies lean on sugar and chocolate to do the most
These cookies have layers of flavors. The browned butter adds nutty caramel notes that linger.
Cinnamon adds warmth you don’t immediately notice but miss when it’s gone.
And that sprinkle of coarse sea salt on top, cutting through the sweetness and making the chocolate flavor shine.
Again, sea salt is not just for salinity; the coarse crystals also add texture
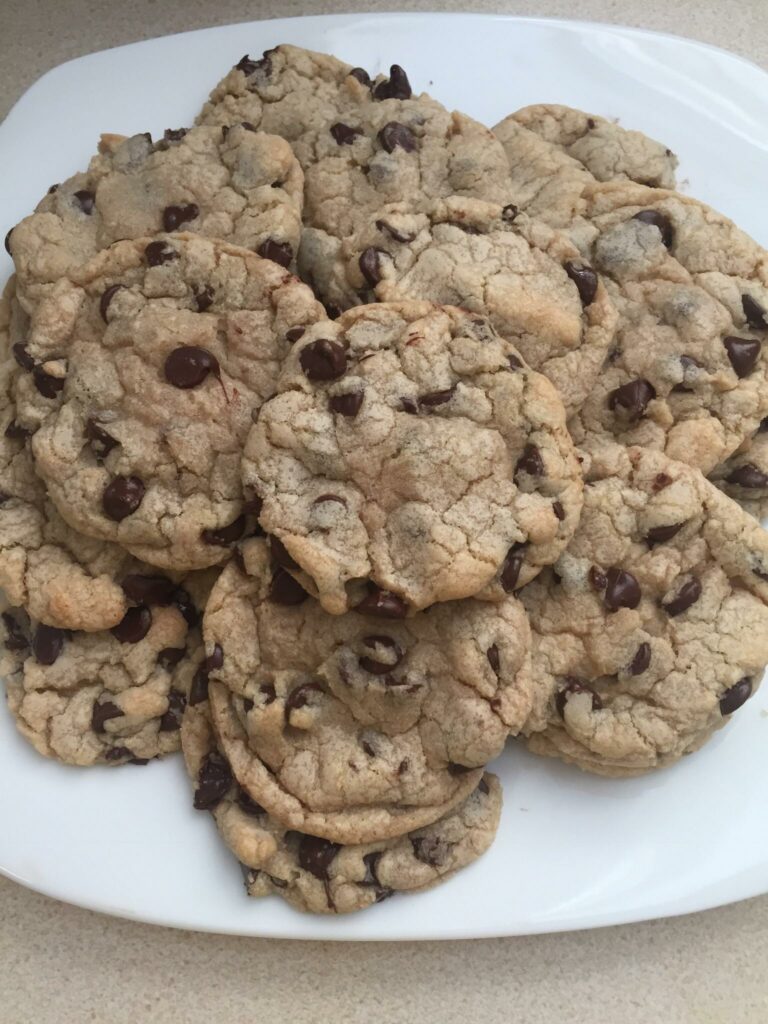
Instead of just sweet, you get complex cookies with crispy edges, soft centers, melty chocolate pockets, and a little crunch of salt.
The Ingredients You’ll Need
- ½ cup (1 stick) butter
- ½ cup white sugar
- ½ cup packed light brown sugar
- 1 large egg, at room temperature
- 2 teaspoons vanilla extract
- ½ teaspoon salt
- ½ teaspoon baking soda
- A small dash of cinnamon
- 1 & ⅓ cups all-purpose flour
- 1 heaping cup chocolate chips (go half semisweet, half dark for balance)
Procedure
Step 1: Brown the butter
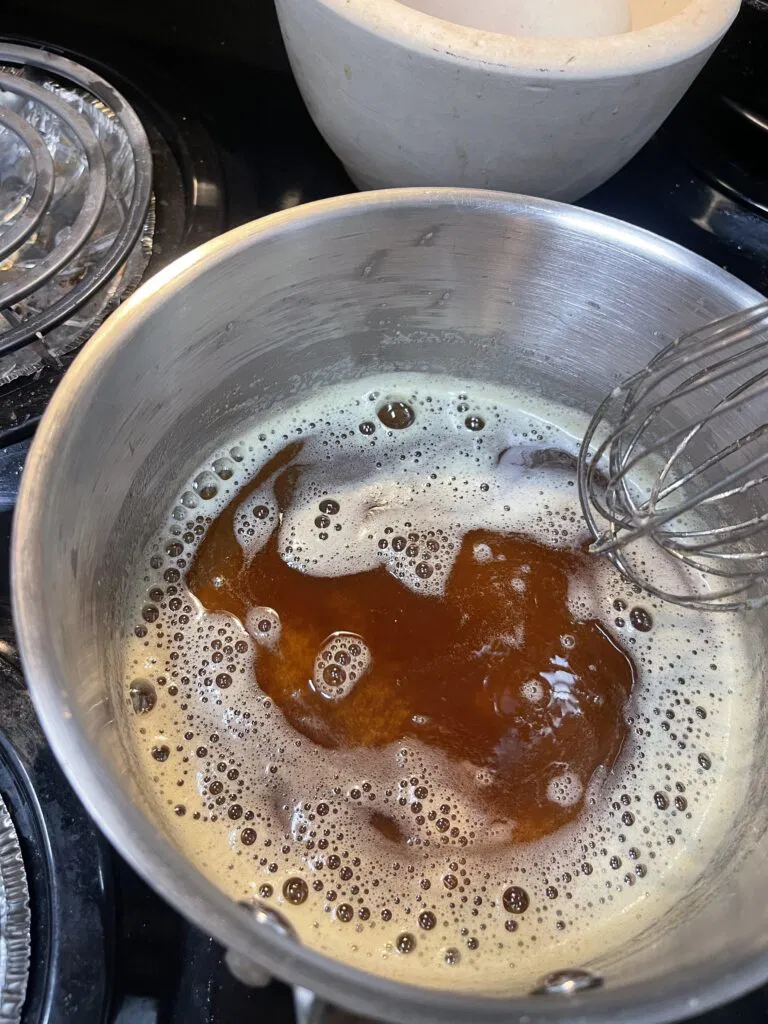
- Melt the butter in a saucepan, stirring until it turns golden and smells nutty.
- Transfer to a mixing bowl and let it cool for 5–10 minutes.
Notes
- Just be careful not to burn the butter you have to pay close attention.
- Low heat, stir, and don’t leave the stove
- Also use your nose, you know your browned butter is done when it starts smelling nutty, almost like ghee.
- Also take off the heat immediately, or remove a little early. As the butter browning will continue browning rapidly even off the heat from the hot pan and may end up burning…Maybe transfer to another container instantly is the best move.
Step 2: Add sugars and egg
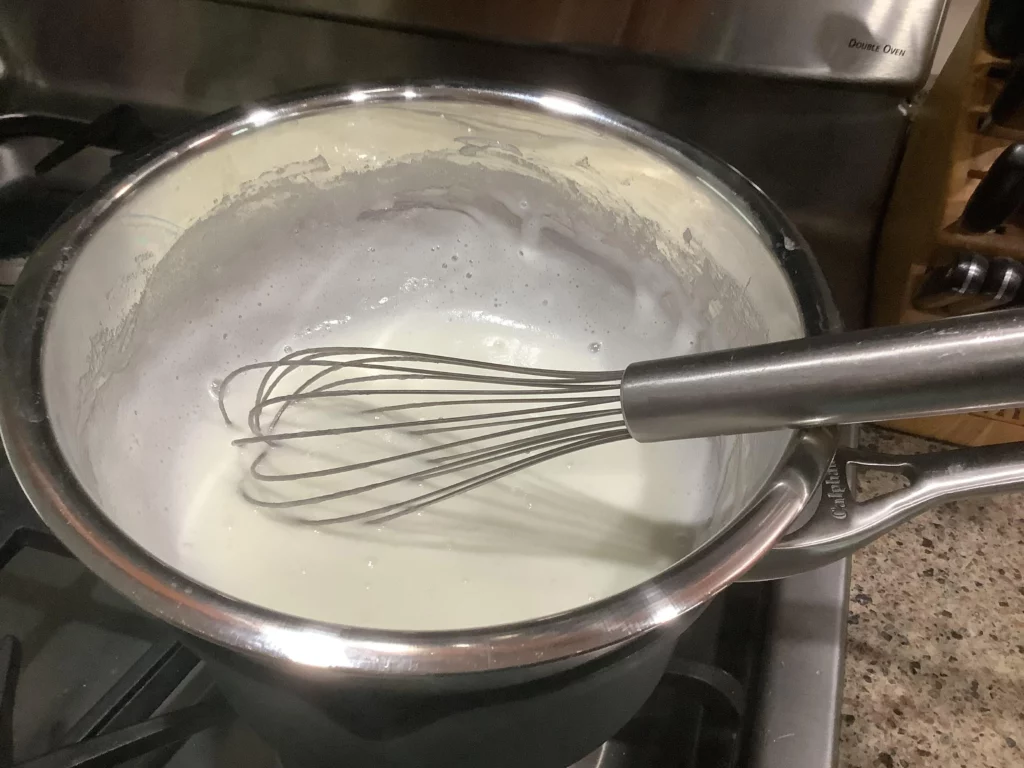
- Whisk in both sugars until smooth.
- Add the egg and whisk again until glossy.
Notes:
- This has two purposes: To prevent eggs from curdling if a hot mixture like milk is ever added, and the second reason(relevant for this case) is the creaming effect.
- Whisking eggs and sugar traps in the air that gives a good texture to the cookies, and a good rise if we were making cakes.
Step 3: Flavor the Egg-Sugar Mixture
- Stir in vanilla, salt, and cinnamon.
- Sprinkle the baking soda right on top of the vanilla to start activating. Mix.
Step 4: Add Flour + Chocolate chips
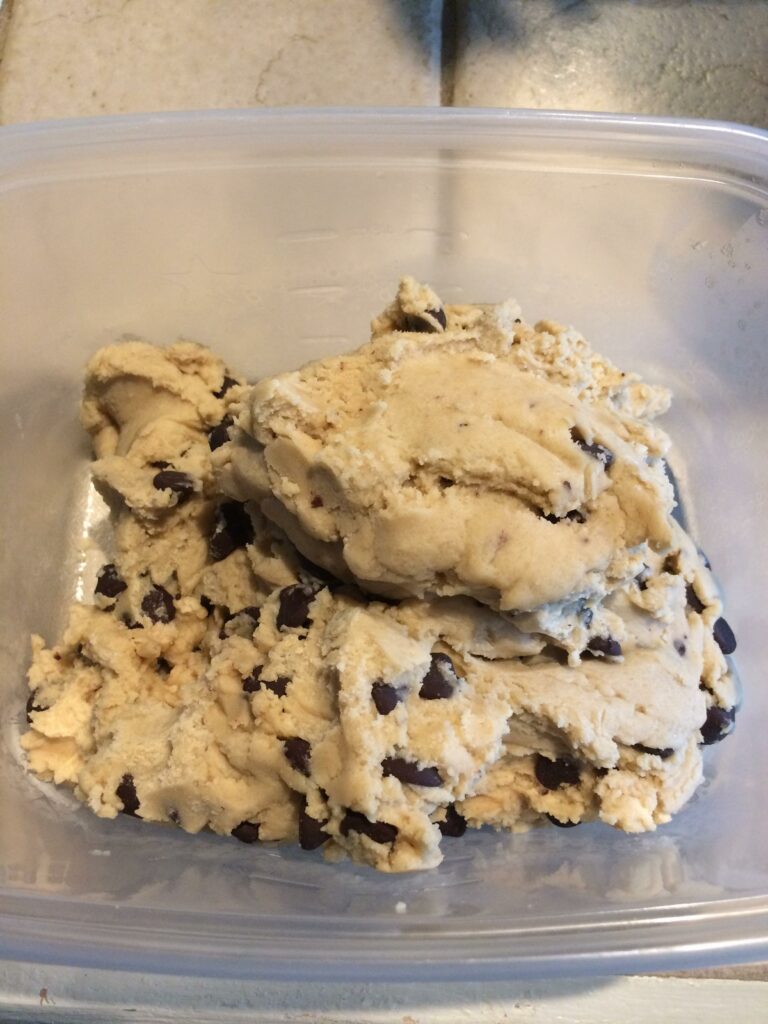
- Add flour and chocolate chips at the same time.
- Fold until the dough just comes together.
Step 5: Chill out
Wrap dough in cling film and refrigerate for at least 2 hours (overnight is better).
Some people even do 36 or 72 hours. Go the longest you can.
Notes
- The purpose for chilling is to improve and deepen the complexity in flavors and to mostly to develeop a good resulting texture from your cookies
- Chilling cookie dough is one of the best things you can do to improve your cookies. Never go below 24 hours if you want great cookies.
- While you can chill them for longer there is not much difference beyond 36 hours according to most people
Step 6: Bake
- Preheat oven to 350°F. Line two baking sheets with parchment.
- Roll dough into golfball-sized balls, spaced apart.
- Bake 11–12 minutes, no longer.
Notes
- Always use the middle rack of your oven for even heat distribution and thus baking
- You shouldnt bake longer than the 12 minutes since cookies will continue baking in your pan even after you take them off the oven.
- So it is better to underbake them.
- Remove them earlier than you would wish for…then let them sit for a while before proceeding to cool them on a wire rack
Step 7: Finishing touch
Sprinkle with flaky sea salt as soon as they come out.
Let them rest 5 minutes on the pan, then transfer to a rack.

Brown Butter Chocolate Chip Cookies
Equipment
- Oven
Ingredients
- ½ cup 115 g butter
- ½ cup 100 g white sugar
- ½ cup 110 g light brown sugar, packed
- 1 large egg
- 2 tsp 10 ml vanilla extract
- ½ tsp 3 g salt
- ½ tsp 3 g baking soda
- 1 dash 1 g cinnamon
- 1⅓ cups 170 g all-purpose flour / plain flour (UK)
- 1 heaping cup 175–180 g chocolate chips (half semisweet, half dark)
Instructions
- Brown butter in a saucepan, transfer to bowl, and cool 5–10 minutes.
- Whisk in white and brown sugars until smooth, then add egg and mix.
- Stir in vanilla, salt, cinnamon, and sprinkle baking soda on top.
- Fold in flour and chocolate chips until just combined.
- Wrap dough in cling film and chill 2 hours or overnight.
- Preheat oven to 350°F, line trays with parchment, and roll dough into balls.
- Bake 11–12 minutes, sprinkle with flaky salt, and cool on rack.
Notes & Hacks
- Skipping browned butter? You can, but you’ll miss the nutty depth. At least cook off some water in the butter to avoid flat cookies.
- Salting. If you’re not topping with flaky salt, bump the dough salt to a full teaspoon.
- Peanut butter twist. Replace the egg with ⅓ cup creamy peanut butter and swap chips for peanut butter chips. Different, but good. But doesn’t work well with cinnamon, so drop the cinnamon
Want Chewier and Soft Chocolate Chip Cookies Instead?
- All-purpose flour: 10 1/2 oz (300 g)
- Salt: 1/2 tsp (3 g)
- Baking soda: 1/2 tsp (2 g)
- Butter, melted: 12 tbsp (170 g)
- Light brown sugar, packed: 7 oz (200 g)
- Granulated sugar: 3 1/2 oz (100 g)
- Large egg: ~50 g
- Large egg yolk: ~18 g
- Vanilla extract: 2 tsp (~10 g)
- Chocolate chips: 12 oz (340 g)
Instructions:
- Preheat oven to 350°F (175°C). Place the rack in the center.
- Mix flour, salt, and baking soda in a bowl; set aside.
- Mix melted butter, brown sugar, and granulated sugar until smooth.
- Add egg, yolk, and vanilla; mix until slightly lighter in color.
- Stir in dry ingredients and chocolate chips until combined.
- Scoop tablespoon-sized portions onto parchment-lined sheets.
- Bake 10–12 minutes until edges are lightly browned. Add 1–2 minutes if using frozen dough.
- Cool and store in an airtight container (or freeze up to 2 months).
FAQs
Q: Do I really need to chill the dough?
Yes. Chilling solidifies the butter, controls the spread, and deepens flavor. Two hours minimum, overnight if you can.
Q: Can I freeze the dough?
Absolutely. Roll into balls, freeze on a tray, then bag them.
Bake from frozen, just add 1–2 minutes.
Q: Why brown the butter?
Because it adds depth.
The milk solids toast, giving you nutty, caramel-like notes you can’t get from plain melted butter.
Q: Can I use milk chocolate chips instead?
Sure, but they’ll make the cookies sweeter.
Dark or semisweet balances better with the browned butter.
Q: How long do they keep?
Stored in an airtight container, they stay fresh about 4–5 days.
You can also freeze baked cookies for up to 2 months.
Leave a Reply